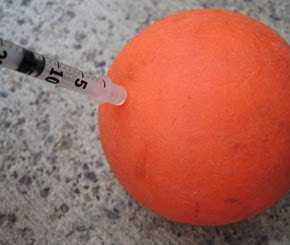
 Filling a hockey ball with water will reduce its bounce and increase its weight, causing it to act more like a puck. Injecting your hockey ball with liquid probably won’t take you more than 10 minutes and shouldn’t cost you anything.
Some hockey balls like the Franklin Anti-Gravity System (AGS) come pre-filled with liquid so if you don’t already have a hockey ball, you may want to go that route. However, If you already have a hockey ball laying around, why not enhance it yourself? Here’s how:
First, you will need to poke a hole in the ball where you can insert the liquid. A push pin or thumbtack will be strong enough to penetrate the plastic, but small enough it won’t leave a hole too large to seal off when the time comes.
Next, you will fill the ball with water. A syringe is preferred because you can control the exact amount of water going in. If you don’t have a syringe you could ask a diabetic relative or the junkie on the corner. Better yet, you could forgo the needle and just submerge the ball in a water. When you’re done, the ball should probably contain around 25 mL of liquid and should weigh about an ounce more than it did empty.
Lastly, you will need to seal the puncture you made earlier. A soldering iron works well because you have precise control and heating stays consistent. If you don’t have a soldering iron you can just heat up the head of a nail with a lighter until its hot enough to “cauterize the wound”. If you apply the heat for too long the plastic will thin out so be careful. Run the ball under cold water to make sure the plastic has set. Give it a squeeze to ensure a proper seal; no water or air should escape. If it passes the test, congratulations! You now have yourself a liquid-filled hockey ball.
Special thanks to Bevan for the tip.
Tags: ball


